Category: Uncategorized

  • How to Choose and Use Fragrance Oils for Candle Making

    How to Choose and Use Fragrance Oils for Candle Making

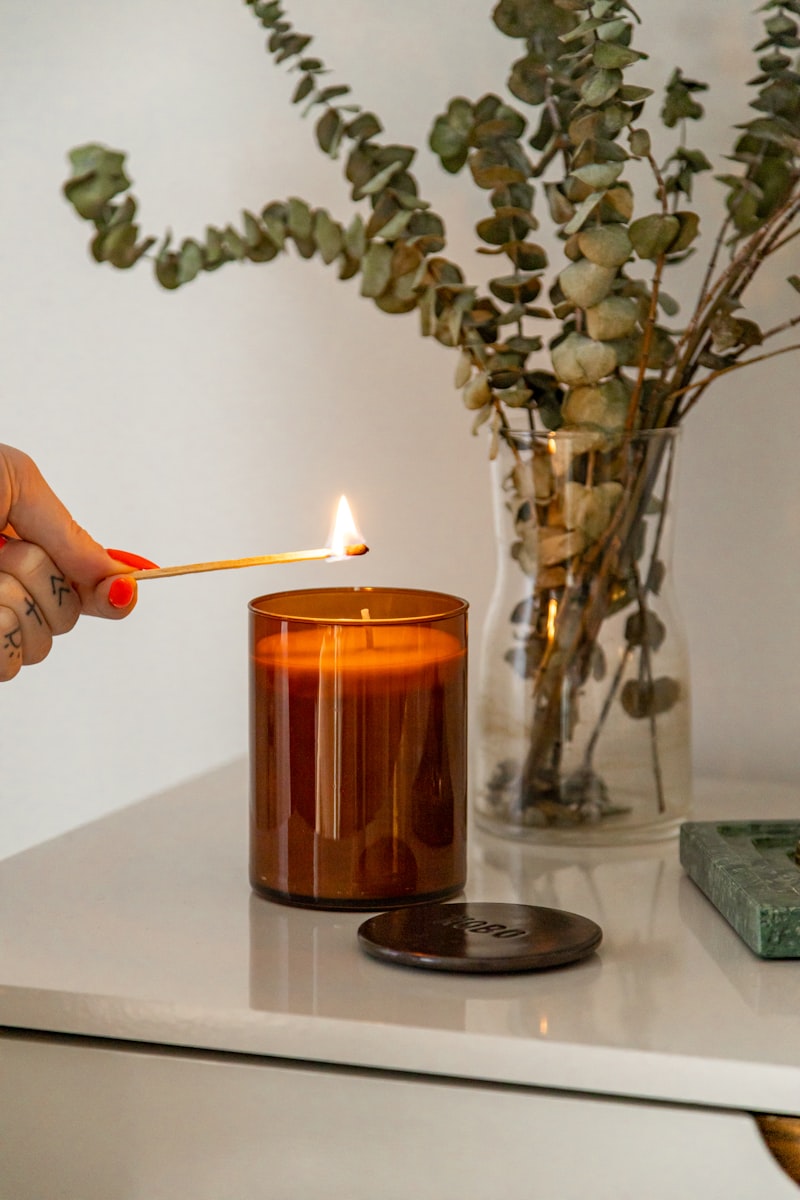
    Fragrance is what turns a plain block of wax into something people want to light, display, and buy. Getting the scent right — the type of fragrance, the amount you add, the temperature at which you add it, and how long you let the candle cure — determines whether your candle fills a room with scent or barely registers at arm’s length.

    This guide covers the practical side of scenting candles, from choosing between fragrance oils and essential oils to dialling in the right load percentage for your wax type.

    Fragrance Oils vs Essential Oils

    There are two broad categories of scent you can add to candles, and the choice between them affects performance, cost, and how you market the finished product.

    Fragrance oils are synthetic or semi-synthetic blends formulated specifically for candle making. They are designed to bind with wax, withstand heat, and release scent steadily as the candle burns. The range of available scents is enormous — everything from realistic bakery aromas to complex designer-inspired blends that could never come from a single plant extract. Fragrance oils typically produce a stronger scent throw than essential oils at the same loading percentage.

    Essential oils are natural plant extracts obtained through distillation or cold pressing. Lavender, eucalyptus, peppermint, and tea tree are among the most popular for candle making. They appeal to customers who want completely natural products, and they carry the aromatherapy angle that sells well in certain markets. The trade-off is a lighter scent throw — essential oils are more volatile than synthetic fragrance oils, which means more of the scent evaporates during the melting and pouring process.

    Candle Fragrance Oil Set

    Candle Fragrance Oil Set – 12 Scents (10ml Each)

    4.3 out of 5 stars

    From £13.99

    View on Amazon

    How Much Fragrance to Add

    Fragrance load is expressed as a percentage of the total wax weight. The standard range for most candle waxes is 6-10%, and the right amount depends on your wax type, the specific fragrance, and your personal preference.

    Soy wax: Most soy waxes can hold 6-10% fragrance. Start at 8% and adjust from there. Going above 10% with soy wax often causes sweating (beads of oil on the surface) without meaningfully improving scent throw. For a 200g candle, 8% means adding 16g of fragrance oil.

    Paraffin wax: Paraffin can handle higher fragrance loads — up to 10-12% in many formulations. It also releases scent more aggressively than soy, so you may not need as much to achieve the same perceived strength. Start at 8-10% for paraffin.

    Essential oils: Use a higher percentage (8-10%) to compensate for their lighter throw. Some essential oils — particularly citrus scents — evaporate faster than others, so you may need to go towards the higher end for lemon, orange, or grapefruit. Lavender and eucalyptus hold up better.

    Temperature Matters More Than You Think

    Adding fragrance at the right temperature is one of the most critical steps in candle making, and it is where many beginners go wrong.

    If the wax is too hot when you add fragrance (above 80 degrees Celsius), the volatile compounds in the oil will burn off or evaporate, leaving you with a candle that smells faint despite having the right fragrance percentage. If the wax is too cool (below 55 degrees Celsius), the oil will not bind properly with the wax and may pool on the surface or create wet spots on the glass.

    For soy wax, the ideal window is 60-65 degrees Celsius. Remove the wax from heat, let it cool to this range, add your fragrance, and stir continuously for two full minutes. Thorough stirring is not optional — it distributes the fragrance evenly throughout the wax so every section of the candle performs consistently.

    Hot Throw vs Cold Throw

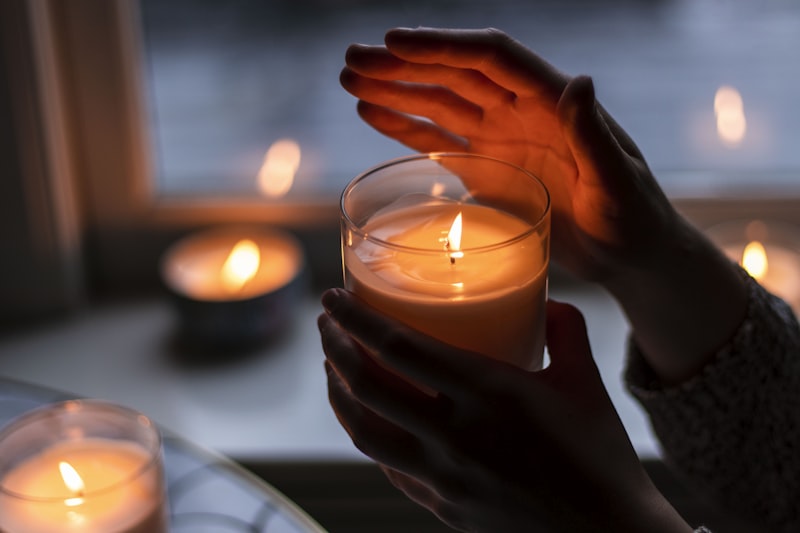
    Candle makers talk about two types of scent performance. Cold throw is how the candle smells when unlit — the scent you notice when you pick up a jar and sniff. Hot throw is the scent released while the candle is burning, carried into the room by the heated wax pool.

    A candle with good cold throw but weak hot throw usually has a fragrance that does not release well at burning temperature. A candle with good hot throw but weak cold throw may just need more curing time.

    If you are selling candles, cold throw matters because it is the first impression a customer gets. If the candle does not smell appealing in the jar, it does not get purchased — regardless of how well it performs when lit.

    Curing Time and Scent Development

    Freshly poured candles almost always have weaker scent throw than cured candles. During the curing period (1-2 weeks for soy wax, shorter for paraffin), the fragrance oil continues to bond with the wax molecules, creating a more stable and potent scent profile.

    Rushing the cure is the most common reason beginners think their candles have weak scent. If you test burn a soy candle the day after pouring and find the scent disappointing, wait another week and test again — the difference can be dramatic.

    For the strongest scent throw, let soy candles cure for a full two weeks in a cool, dark place with the lids on. Paraffin candles typically need less curing time — 3-5 days is often sufficient.

    Popular UK Scent Combinations

    Single-note fragrances work well, but blending two or three scents creates more complex and distinctive candles. Some combinations that sell consistently in the UK market:

    Vanilla and sandalwood — warm, cosy, and universally appealing. Lavender and eucalyptus — fresh and calming, strong aromatherapy association. Cinnamon and orange — seasonal favourite for autumn and winter. Fresh linen and sea salt — clean and airy, popular in spring and summer. Rose and oud — luxurious and distinctive, commands a premium price.

    Start with proven combinations before experimenting with unusual blends. Our beginner guide walks through the full process of making a scented candle from scratch, including the exact temperatures and timings for each step. If you are still choosing between wax types, that will also affect which fragrances perform best in your candles.

    Related Reading

  • Best Candle Making Kits for Beginners in 2026

    Best Candle Making Kits for Beginners in 2026

    A candle making kit is the fastest way to go from zero experience to a finished candle. Instead of sourcing wax, wicks, fragrance, containers, and tools separately — which can feel overwhelming when you do not know what you need — a kit bundles everything together with instructions so you can start pouring the same day it arrives.

    Not all kits are equal though. Some include generous amounts of quality materials, while others cut corners with thin wicks, poor-quality fragrance, or confusing instructions. This guide covers what to look for in a beginner kit and highlights the options worth considering on Amazon UK.

    What Makes a Good Starter Kit

    A worthwhile candle making kit should include, at minimum: enough wax to make at least 4-6 candles, pre-tabbed wicks that match the included containers, a pouring vessel, a thermometer, and some form of fragrance. Kits that skip the thermometer or only include enough wax for 1-2 candles are rarely good value.

    The best kits also include wick centring devices, adhesive dots for securing wick tabs, and clear step-by-step instructions. Some come with dye blocks for colour experimentation, which is a nice bonus but not essential for a first attempt.

    Top Candle Making Kits on Amazon UK

    CraftZee Soy Candle Making Kit

    The CraftZee kit consistently ranks among the best sellers on Amazon UK, and the reviews reflect genuine satisfaction rather than just volume. It includes soy wax flakes, pre-tabbed cotton wicks, a pouring pot, a thermometer, fragrance oils, dye blocks, and metal tins — everything needed for a complete candle from start to finish.

    What sets it apart from cheaper kits is the quality of the included fragrance oils and the clarity of the instructions. The tins are a good size for beginners — small enough that your wax supply goes further, but large enough to produce a satisfying burn time. If you want one box that covers everything with no additional purchases needed, this is the one to go for.

    CraftZee Soy Candle Making Kit

    CraftZee Soy Candle Making Kit for Adults

    4.5 out of 5 stars

    From £24.99

    View on Amazon

    Hearts and Crafts Soy Wax Kit

    Hearts and Crafts takes a different approach — it gives you generous quantities of core supplies (5 lbs of soy wax, 50 wicks, centring devices, adhesive dots) but does not include fragrance or containers. This makes it a better fit if you already know what scents you want to use or prefer to choose your own jars.

    The 5 lbs of wax is enough for dozens of candles, so the per-candle cost works out lower than most all-in-one kits. The wicks are good quality and the centring devices are a thoughtful inclusion that many kits skip. Think of this as a supplies kit rather than a project kit — it gives you the raw materials to experiment freely.

    Hearts and Crafts Soy Wax Kit

    Hearts and Crafts Soy Wax Candle Making Kit

    4.4 out of 5 stars

    From £29.99

    View on Amazon

    Beeswax Sheet Rolling Kit

    If melting wax and dealing with thermometers sounds like more than you bargained for, a beeswax sheet kit is the simplest possible entry point. You warm a honeycomb sheet with a hair dryer, lay a wick along the edge, and roll. Five minutes, no mess, no equipment beyond what is in the box.

    These kits are particularly good for children, craft workshops, and gift givers who want a relaxed creative experience rather than a chemistry project. The candles look charming with their golden honeycomb texture and burn with a natural honey scent. They are not as customisable as poured candles, but as a first taste of candle making, they are hard to beat.

    Beeswax Sheet Rolling Kit

    Complete Candle Making Kit with Beeswax Sheets (12 Sheets)

    4.5 out of 5 stars

    From £19.99

    View on Amazon

    Kit vs Individual Supplies: When to Switch

    Kits are cost-effective for your first few batches, but once you know what you like, buying individual supplies in bulk saves money and gives you more control. Most candle makers switch to buying wax, wicks, and fragrance separately after their second or third kit.

    When you are ready to move beyond kits, start by choosing a wax type that suits your goals, then follow our wick sizing guide to match your containers. Pick up a few fragrance oils in the scent families you enjoy, and you will have a setup that produces better candles at a lower per-unit cost than any kit.

    For a complete walkthrough of the candle-making process from start to finish, including temperature guidance and troubleshooting, check our beginner candle making guide.

    Related Reading

  • Why Your Candle Is Tunnelling (And How to Fix It)

    Why Your Candle Is Tunnelling (And How to Fix It)

    Tunnelling is the most common and most frustrating problem in candle making. You light your candle, burn it for an hour or two, and blow it out — only to find a narrow well of melted wax around the wick while the rest of the surface stays solid. Over repeated burns, the tunnel gets deeper and the usable wax shrinks until the wick drowns in a pool of liquid wax and the candle is effectively finished with half its wax still stuck to the sides of the jar.

    The good news is that tunnelling is almost always fixable, and once you understand why it happens, it is easy to prevent in future candles.

    Why Candles Tunnel

    Tunnelling happens when the melt pool — the circle of liquid wax that forms around the flame — does not reach the full diameter of the container. Soy wax has a “memory” effect: wherever the melt pool reaches on the first burn sets the pattern for every burn that follows. If your first burn only melts a 4cm circle in an 8cm jar, the candle will continue to melt in that same 4cm pattern until the wick is gone.

    There are two main causes. The first is an undersized wick — one that simply does not generate enough heat to melt the full surface. The second is an insufficient first burn — blowing out the candle before the melt pool has had time to reach the edges.

    How to Fix a Tunnelling Candle

    The Foil Method

    This is the most reliable rescue technique. Tear off a piece of aluminium foil large enough to cover the top of the jar, then fold it in half for durability. Place it over the candle opening, leaving a small hole (about 2cm) in the centre for the flame to breathe. Light the candle and leave it for 2-3 hours.

    The foil traps heat above the candle, raising the temperature inside the jar enough to melt the wax walls. Once the surface is fully liquid and level, remove the foil carefully (it will be hot) and let the candle burn normally. The reset melt pool should hold on subsequent burns.

    The Hair Dryer Method

    If you do not want to burn the candle, you can use a hair dryer on its highest heat setting to melt the wax surface evenly. Hold the dryer 10-15cm above the candle and move it in slow circles until the entire surface is liquid. This levels the wax and resets the surface, though it does not address the underlying wick size issue — the candle may tunnel again on the next burn cycle.

    The Oven Method (For Severe Tunnelling)

    For candles with deep tunnels where the wick is too far down to light, place the jar on a baking tray in an oven set to the lowest temperature (typically 50-60 degrees Celsius). The wax will slowly melt and level out over 15-20 minutes. Remove carefully, let it resolidify at room temperature, and trim the wick before relighting.

    How to Prevent Tunnelling in Your Candles

    Prevention is easier than fixing. These three habits will eliminate tunnelling in the vast majority of cases.

    Choose the right wick size. This is the single biggest factor. Your wick needs to generate enough heat to create a full melt pool across the container diameter within 2-3 hours. If you are consistently getting tunnelling, your wick is too small. Read our wick sizing guide for specific recommendations by container size.

    Get the first burn right. The first time you light a new candle, plan to keep it burning until the melt pool reaches the edges of the container. For a typical 8cm jar, this takes 2-4 hours. Never blow out a candle on its first burn before the pool is complete — the wax memory will lock in the smaller diameter.

    Trim the wick before every burn. A wick that is too long produces a tall, flickering flame that generates inconsistent heat. Trim to 5-6mm before lighting, which creates a stable flame that spreads heat evenly across the wax surface. A wick trimmer makes this much easier than scissors, especially in deep jars.

    When Tunnelling Means Bigger Problems

    If you are making candles to sell and getting consistent tunnelling across a batch, the issue is almost certainly wick sizing. No amount of customer instructions about first burns will compensate for an undersized wick. Run proper burn tests with multiple wick sizes before committing to production batches.

    Occasionally, tunnelling is caused by factors beyond wick size. Candles placed in draughty locations will tunnel because moving air disrupts the melt pool. Candles with very high fragrance loads can clog wicks, reducing their heat output. And some container shapes — particularly tall, narrow vessels — are inherently more prone to tunnelling because the heat has further to travel to reach the walls.

    If you are a beginner still getting to grips with the basics, our complete candle making guide covers the fundamental technique step by step. Getting the process right from the start prevents most of these issues from ever occurring.

    Related Reading

  • Best Wicks for Soy Candles: Sizing, Types, and Testing Guide

    Best Wicks for Soy Candles: Sizing, Types, and Testing Guide

    The wick you choose has more impact on how your candle performs than any other single component — more than the wax, the fragrance, or the container. Get the wick right and your candle burns evenly, throws scent well, and lasts for hours. Get it wrong and you end up with tunnelling, smoking, drowning wicks, or dangerously large flames.

    This guide covers the main wick types available for soy wax candles in the UK, how to pick the right size for your container, and how to test your way to a clean burn.

    Why Wick Choice Matters So Much

    A candle wick is not just a piece of string that carries a flame. The wick controls the size of the melt pool (the liquid wax that forms as the candle burns), which in turn determines how much fragrance is released and whether the candle burns evenly across the full diameter of the container.

    If the wick is too small, the melt pool will not reach the edges of the jar, causing tunnelling — that frustrating ring of solid wax around the outside that never melts. If the wick is too large, the flame will be too hot, the candle will burn through wax too quickly, and you will see black soot collecting on the jar walls.

    Cotton Wicks (ECO and CD Series)

    Flat-braided cotton wicks are the most popular choice for soy candle makers. The two main series you will find on Amazon UK are the ECO series and the CD series.

    ECO wicks are made from natural cotton with a thin paper thread woven through the braid. This paper filament causes the wick to curl slightly as it burns, which keeps the flame self-trimming and reduces the mushrooming (carbon buildup) that you see on straight wicks. ECO wicks burn at a moderate temperature and work well with soy wax at standard fragrance loads (6-10%).

    CD wicks have a similar cotton construction but are designed to burn slightly hotter. They are a better match for heavily fragranced candles or candles with additives like dyes that can clog cooler-burning wicks. If your ECO wick is tunnelling despite being the right diameter, stepping up to a CD wick of the same size often solves the problem.

    ECO Pre-Tabbed Cotton Wicks

    ECO Pre-Tabbed Cotton Wicks (100 Pack, Mixed Sizes)

    4.4 out of 5 stars

    From £7.99

    View on Amazon

    Wooden Wicks

    Wooden wicks have surged in popularity over the past few years, largely thanks to the gentle crackling sound they produce — like a miniature fireplace. They create a wider, shorter flame compared to cotton wicks and look distinctive in a finished candle.

    Wooden wicks work well in soy wax but require some adjustment to your process. They need to be trimmed shorter than cotton wicks — about 3-4mm — and they perform best in containers where the wick width is roughly half the jar diameter. The main challenge is that wooden wicks can be inconsistent; grain patterns in the wood mean no two wicks burn identically, so you may need to test more samples to find reliable performance.

    Wooden Wicks with Metal Clips

    Wooden Wicks with Metal Clips (50 Pack)

    4.2 out of 5 stars

    From £9.99

    View on Amazon

    How to Size Your Wick

    Wick sizing depends primarily on the diameter of your container. Most wick suppliers provide sizing charts, but these are starting points rather than guaranteed answers — you will still need to test.

    As a rough guide for soy wax container candles: containers up to 5cm diameter work with small wicks (ECO 2 or ECO 4). Containers 6-8cm suit medium wicks (ECO 6 to ECO 10). Containers 8-10cm need larger wicks (ECO 12 to ECO 14). Anything wider than 10cm typically needs multiple wicks.

    These are approximations. Your exact fragrance load, dye usage, and pouring temperature all influence how the wick performs. The only way to know for certain is to run burn tests.

    How to Run a Burn Test

    A proper burn test takes time but saves you from selling candles that perform poorly. Here is the process:

    Make three identical candles using the same wax, fragrance, and container, but with three different wick sizes — one size down, your best guess, and one size up. Let all three cure for the same amount of time (at least one week, ideally two).

    Burn each candle for 4 hours at a time. After each burn session, check the melt pool depth and diameter. The ideal melt pool reaches the edges of the container within 2-3 hours and is roughly 1cm deep. Note any smoking, mushrooming, or soot on the glass.

    The right wick is the one that produces a full melt pool without excess smoking. If you are between sizes, go with the slightly larger option — a wick that is marginally too big is easier to manage (just trim shorter) than one that tunnels.

    Common Wick Problems and Fixes

    Tunnelling: Your wick is too small. Size up, or switch from ECO to CD for a hotter burn. Also make sure you are burning long enough on the first use — the first burn should last until the melt pool reaches the edges, even if it takes 3-4 hours. Read our beginner guide for more on getting the first burn right.

    Mushrooming: Carbon buildup at the tip of the wick. Usually means the wick is slightly too large or the fragrance load is high. Trim more aggressively before each burn.

    Smoking/sooting: Wick too large, wick too long, or drafts. Trim to 5mm and keep candles away from open windows and fans. Check our wax comparison guide — some waxes soot more than others.

    Drowning wick: The wick is consumed faster than it can draw up wax, causing the flame to shrink and eventually extinguish. This happens when the wick is too small for the wax pool depth. Size up or reduce the container diameter. Browse our wick selection for pre-tabbed options in multiple sizes.

    Related Reading

  • Soy vs Paraffin vs Beeswax: Which Candle Wax Should You Use?

    Soy vs Paraffin vs Beeswax: Which Candle Wax Should You Use?

    Choosing the right wax is the first real decision you make as a candle maker, and it affects everything that follows — how the candle burns, how it holds fragrance, how it looks, and how much it costs to produce. The three most common options in the UK are soy wax, paraffin wax, and beeswax, each with distinct strengths and trade-offs.

    This guide breaks down the practical differences between all three so you can pick the right wax for your project rather than just following trends.

    Soy Wax: The Popular All-Rounder

    Soy wax is made from hydrogenated soybean oil and has become the default choice for most beginner candle makers in the UK. Its popularity comes down to a combination of ease of use, clean burning, and strong marketing around its natural credentials.

    Best for: Container candles, beginners, and anyone marketing “natural” or “eco-friendly” products.

    Soy wax melts at a low temperature (around 46-50 degrees Celsius), which makes it forgiving to work with and means it does not require specialist equipment. It produces minimal soot, burns slower than paraffin, and cleans up with soap and water — a genuine advantage when you are learning and making mistakes.

    The downsides are real though. Soy wax has a weaker scent throw than paraffin, particularly on the “cold throw” (the scent you notice before lighting the candle). It is also prone to frosting — a white crystalline pattern that forms on the surface — which is cosmetic rather than functional but can make candles look less polished. Soy wax is too soft for freestanding pillars unless blended with harder waxes.

    Soy Wax Flakes 5kg

    Golden Brands 464 Soy Wax Flakes (5 kg)

    4.4 out of 5 stars

    From £19.99

    View on Amazon

    Paraffin Wax: The Performance Champion

    Paraffin wax is a petroleum by-product that has been used in candle making for over 150 years. It fell out of fashion with the rise of soy wax, but it remains the industry standard for mass-produced candles for good reason — nothing else matches its performance on scent throw and colour vibrancy.

    Best for: Pillar candles, moulded candles, heavily scented candles, and bold colours.

    Paraffin has a higher melting point (typically 55-65 degrees Celsius depending on the grade), which makes it firm enough for freestanding pillars and moulds. It holds up to 10-12% fragrance load and releases scent powerfully both cold and hot. Colours dissolve cleanly and stay vibrant, which is why paraffin dominates the market for dyed candles.

    The main criticism of paraffin is that it is a petroleum product, which matters to customers who prioritise natural ingredients. It also produces slightly more soot than soy wax, though a properly wicked and trimmed paraffin candle burns quite cleanly. For makers selling at markets, the “natural vs synthetic” conversation comes up often.

    Paraffin Wax Pellets 5kg

    Paraffin Wax Pellets for Candle Making (5 kg)

    4.3 out of 5 stars

    From £16.99

    View on Amazon

    Beeswax: The Premium Natural Option

    Beeswax is the oldest candle-making material, used for centuries before paraffin and soy entered the picture. It is a natural wax produced by honeybees and has properties that neither soy nor paraffin can replicate.

    Best for: Taper candles, rolled candles, dipped candles, and unscented luxury products.

    Beeswax has a naturally high melting point (62-64 degrees Celsius), burns significantly longer than both soy and paraffin, and produces a warm, subtle honey aroma without any added fragrance. The natural golden colour is attractive on its own. It is the cleanest-burning wax available and is sometimes claimed to purify indoor air, though the evidence for this is limited.

    The cost is the main barrier. Beeswax is roughly 3-5 times more expensive than soy wax per kilogram, which makes it impractical for beginners who are still learning and wasting material. It also does not hold added fragrances as well as soy or paraffin, so it is best used for its natural honey scent rather than as a carrier for synthetic fragrances.

    Beeswax Pellets 1kg

    Beeswax Pellets – Natural Yellow (1 kg)

    4.6 out of 5 stars

    From £14.99

    View on Amazon

    Quick Comparison

    Scent throw: Paraffin wins by a clear margin, followed by soy, then beeswax.

    Burn time: Beeswax burns longest, then soy, then paraffin.

    Ease of use: Soy is the most forgiving for beginners. Paraffin requires more temperature precision. Beeswax has the highest melting point and needs careful handling.

    Cost: Paraffin is cheapest, soy sits in the middle, beeswax is significantly more expensive.

    Environmental perception: Soy and beeswax are seen as “natural” choices. Paraffin carries the petroleum association, fair or not.

    Which Should You Choose?

    If you are just starting out and want to make your first candle with the least frustration, go with soy wax. It is cheap enough to experiment with, easy to clean up, and produces good results without much fuss.

    If you are making candles to sell and scent throw is your priority, test paraffin or a soy-paraffin blend. Many successful UK candle businesses use blends that combine soy’s clean-burning reputation with paraffin’s superior fragrance performance.

    If you want to make premium, unscented taper or pillar candles — or you are drawn to the craft tradition — beeswax is worth the investment. Pair it with beautiful containers and your candles will look and burn like high-end products.

    There is also a growing category of coconut-soy blends worth exploring. They combine the best properties of both waxes and are becoming the go-to choice for luxury candle brands in the UK.

    Related Reading

  • How to Make Candles at Home: A Complete Beginner Guide

    How to Make Candles at Home: A Complete Beginner Guide

    Making candles at home is one of those crafts that looks complicated until you actually try it. The basic process — melt wax, add fragrance, pour into a container — takes about 30 minutes of active work. The rest is waiting for the wax to cool and cure.

    This guide walks through every step of making your first soy wax container candle, from gathering supplies to trimming the wick before your first burn. By the end, you will have a finished candle and enough confidence to start experimenting with different scents, colours, and containers.

    What You Need to Get Started

    Before you melt any wax, gather everything in one place. There is nothing worse than realising you forgot the thermometer while your wax is cooling in the pot.

    Here is what you need for a basic soy wax container candle:

    Soy wax flakes — about 200g per medium candle. Pre-tabbed cotton wicks — sized to match your container diameter. A pouring pot or old saucepan for melting. A digital thermometer for checking wax temperature. Fragrance oil — roughly 10-12ml per 200g of wax. A glass jar or tin to pour into. Wick centring device or a pencil and tape. Adhesive dots or hot glue to secure the wick tab.

    CraftZee Soy Candle Making Kit

    CraftZee Soy Candle Making Kit for Adults

    4.5 out of 5 stars

    From £24.99

    View on Amazon

    Step 1: Prepare Your Container and Wick

    Start by sticking the wick tab to the bottom centre of your jar. Peel the backing off an adhesive dot, press it onto the metal tab, then push the tab firmly against the base of the container. Give it a good press — you do not want the wick shifting when you pour.

    Place a wick centring device across the top of the jar to hold the wick straight and taut. If you do not have one, wrap the top of the wick around a pencil resting across the jar rim.

    Step 2: Melt the Wax

    Set up a double boiler by placing your pouring pot inside a larger saucepan of simmering water. Add the soy wax flakes and stir occasionally as they melt. Soy wax melts at a relatively low temperature — around 46-50 degrees Celsius — so this should not take long.

    Keep your digital thermometer in the wax throughout the melting process. You want the wax fully liquid and clear before moving on. Do not overheat it past 85 degrees Celsius, as this can discolour the wax and affect fragrance performance.

    Step 3: Add Fragrance Oil

    Once the wax is fully melted, remove it from the heat and let it cool to around 60-65 degrees Celsius. This is the ideal temperature for adding fragrance oil to soy wax — hot enough to bind properly, cool enough to avoid burning off the scent.

    Add your fragrance oil (roughly 6-8% of the total wax weight — so about 12-16g for 200g of wax) and stir gently for a full two minutes. Proper stirring is important. If you rush this step, the fragrance will not distribute evenly and your finished candle may have weak spots with no scent throw.

    Step 4: Pour the Wax

    Let the wax cool a bit further — to around 50-55 degrees Celsius for soy wax. Pouring too hot causes sinkholes and rough surfaces. Pouring too cool can create adhesion problems where the wax pulls away from the glass.

    Pour slowly and steadily into the centre of the container, keeping the wick centred with your device. Leave about 1cm of space at the top. Save a small amount of wax in the pot for topping off later.

    Step 5: Let It Cool and Top Off

    Leave the candle undisturbed at room temperature for at least 4-6 hours. As soy wax cools, it often develops small sinkholes around the wick — this is completely normal. Once the surface has set, reheat your leftover wax and carefully pour a thin layer to fill any depressions and create a smooth finish.

    Step 6: Cure and Trim

    Here is where patience pays off. Soy wax candles need at least 1-2 weeks of curing time before burning. During this period, the fragrance oil continues to bind with the wax, which dramatically improves the scent throw of the finished candle.

    Before lighting for the first time, trim the wick to about 5-6mm. A wick that is too long will produce a large, flickering flame, excess smoke, and mushrooming at the tip.

    Common Beginner Mistakes to Avoid

    Choosing the wrong wick size is the single most common problem. A wick that is too small will tunnel down the centre without melting the wax pool to the edges. A wick that is too large will burn too hot, producing soot and eating through the wax too quickly. Check our guide to choosing the right wick for sizing advice.

    Skipping the cure time is the second biggest mistake. A freshly poured candle will smell faint compared to one that has cured for two weeks. If your candle seems to have weak scent throw, give it more time before adjusting your fragrance load.

    Adding fragrance at the wrong temperature means the scent either burns off (too hot) or fails to bind with the wax (too cool). The 60-65 degree Celsius window is your target for soy wax.

    What to Try Next

    Once you have made a few basic container candles and feel comfortable with the process, there are plenty of directions to explore. Try different wax types to see how they compare. Experiment with wooden wicks for that crackling fireside sound. Play with layered colours or botanical embeds for more visual interest.

    The beauty of candle making is how forgiving it is. If a candle does not turn out the way you wanted, melt it down and start again. The wax is reusable, and every pour teaches you something new.

    Related Reading