Category: Beginner Guides

  • How to Choose the Right Candle Wick: A Beginner’s Guide

    How to Choose the Right Candle Wick: A Beginner’s Guide

    Getting the wick right is arguably the most important part of candle making. The wrong wick can cause tunnelling, mushrooming, poor scent throw, excessive soot, or an unsafe burn. The right wick gives you an even melt pool, clean burn, and strong fragrance release every time.

    This article contains affiliate links to Amazon. As an Amazon Associate, we earn from qualifying purchases at no extra cost to you. See our full disclosure.

    This guide explains how candle wicks work, the different types available, and — most importantly — how to choose the correct size for your container. If you’re brand new to candle making, read our complete beginner’s guide first for the full picture.

    How Candle Wicks Work

    Candle making supplies and tools

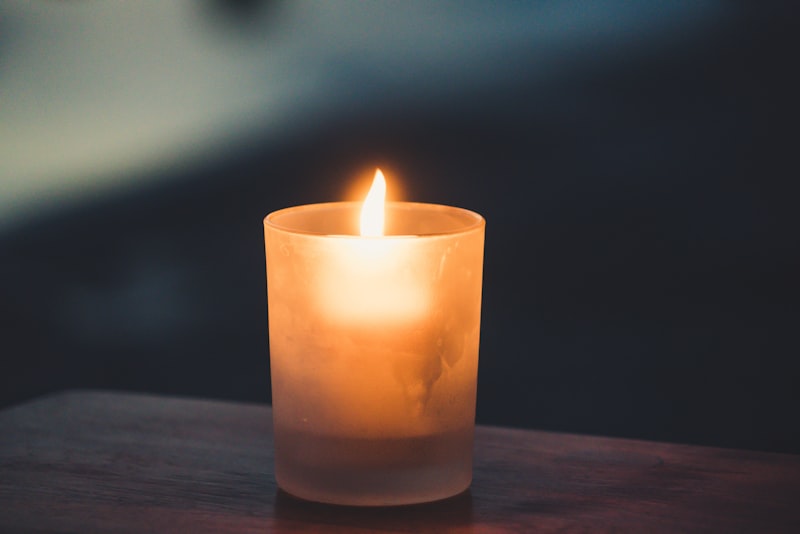
    A candle wick draws melted wax up through capillary action, like a straw. The wax vapourises in the flame, which is what actually burns — the wick itself is just the delivery system. The size and construction of the wick determines how much wax is drawn up, which controls the flame size, the melt pool diameter, and the burn rate.

    If the wick is too small, it can’t draw enough wax to melt all the way to the container edges. This causes tunnelling — the candle burns down the centre, wasting wax and reducing scent throw. If the wick is too large, the flame is oversized, the candle burns through too quickly, and you’ll get soot, mushrooming, and potentially an overheated container.

    Types of Candle Wicks

    The UK candle making community primarily uses these wick types:

    CD (Stabilo) wicks are flat braided cotton wicks with a paper filament woven in. The paper thread helps the wick curl as it burns, which keeps it self-trimming. CD wicks are excellent for soy wax and coconut-rapeseed blends. They’re the most popular choice for UK candle makers working with natural waxes.

    ECO wicks are flat cotton wicks with a thin paper core. They burn slightly cooler than CD wicks and are a good choice if you find CD wicks burn too aggressively in your containers. They work well with soy and soy-blend waxes.

    LX wicks are braided cotton with a stabilising thread. They’re designed for paraffin but also work with soy. LX wicks tend to produce a stable, consistent flame.

    Wooden wicks are a popular aesthetic choice — they produce a gentle crackling sound reminiscent of a fireplace. They look beautiful in container candles but require more testing to get the sizing right, as they behave quite differently from cotton wicks.

    Pre-waxed cotton wicks with sustainers are what most beginners use. These come ready to go — the wick is coated in wax and attached to a small metal tab (sustainer) that sits at the bottom of your container. They’re the easiest option and what we recommend for your first candles.

    How to Choose the Right Wick Size

    Wick sizing depends primarily on your container diameter. The goal is to achieve a full melt pool — where the melted wax reaches all the way to the edges of the container — within about 2–3 hours of burning.

    Here’s a general sizing guide for CD wicks with soy wax (the most common combination for UK makers):

    For containers with a 50–60mm diameter (tealight to small votive): try a CD 4 or CD 5. For 60–70mm diameter (standard small jar): try a CD 6 or CD 8. For 70–80mm diameter (medium jar): try a CD 10 or CD 12. For 80–90mm diameter (large jar): try a CD 14 or CD 16. For containers over 90mm: you may need a CD 18 or CD 20, or consider using two wicks.

    These are starting points, not guarantees. The actual performance depends on your specific wax, fragrance oil, dye, container shape, and room temperature. This is why testing is essential.

    Testing Your Wicks

    Professional candle makers always test multiple wick sizes before committing to a final recipe. Here’s how:

    Make three identical candles using the same wax, fragrance, container, and technique — but use three different wick sizes. Choose the size you think is correct based on the guide above, then one size up and one size down.

    Burn each candle for 4 hours at a time (matching the recommended burn cycle for container candles). Note the melt pool diameter after 2 hours and after 4 hours. Check for mushrooming, soot, and flame height. Repeat over multiple burn sessions until the candle is used up or you’ve gathered enough data.

    The correct wick should achieve a full melt pool (edge to edge) within 2–3 hours, maintain a steady flame height of about 2–3cm, produce minimal soot, and not mushroom excessively.

    Common Wick Problems and What They Mean

    Tunnelling (wax only melts in the centre): wick is too small. Size up. See our detailed tunnelling fix guide.

    Mushrooming (carbon ball on the wick tip): wick is slightly too large, or the candle has been burning too long without trimming. Try sizing down or trimming the wick to 5mm before each burn. Read more in our mushrooming guide.

    Excessive soot (black smoke or residue on the jar): wick is too large, or there’s a draft disturbing the flame. Size down and burn in a draft-free area.

    Weak scent throw: if the melt pool isn’t reaching the edges, the wick is too small. A full melt pool is essential for releasing fragrance. If you’re not getting enough scent despite a full melt pool, the issue is likely with your fragrance oil or cure time rather than the wick. Check our guide on fixing poor scent throw.

    Flame too high or flickering: wick is too large, or it needs trimming. Always trim to 5–6mm before lighting. If the flame is still too high after trimming, size down.

    Where to Buy Wicks in the UK

    Pre-waxed cotton wicks with sustainers are widely available on Amazon UK and are the most convenient option for beginners. Browse our wicks section for our recommended options, or check out our beginner’s guide for a full supply list.

    Related Reading

  • How to Make Candles: The Complete Beginner’s Guide

    How to Make Candles: The Complete Beginner’s Guide

    Making candles at home is one of the most rewarding crafts you can pick up. It’s surprisingly simple, wonderfully creative, and there’s nothing quite like lighting a candle you’ve made yourself. Whether you’re looking for a relaxing new hobby, want to make personalised gifts, or you’re curious about turning it into a small business — this guide covers everything you need to get started.

    This article contains affiliate links to Amazon. As an Amazon Associate, we earn from qualifying purchases at no extra cost to you. See our full disclosure.

    We’ll walk through every step: choosing your wax, picking the right wick, adding fragrance, and pouring your first candle. By the end, you’ll have the confidence to make beautiful candles at home, even if you’ve never done it before.

    What You’ll Need to Make Candles

    Candle making supplies and tools

    Before you start, gather your supplies. Here’s the essential kit list for making your first container candle:

    • Wax — soy wax flakes are the best choice for beginners. They’re easy to work with, clean-burning, and hold fragrance well. We recommend starting with soy wax flakes in 1–2kg bags.
    • Wicks — pre-waxed cotton wicks with sustainers (the little metal tabs at the bottom) are the easiest to use. Choose the right size for your container diameter — we cover this in detail in our wick guide.
    • Container — glass jars, candle tins, or ceramic pots. Make sure whatever you choose is heat-resistant. Browse our containers and jars for ideas.
    • Fragrance oil — optional but recommended. A good fragrance oil transforms a plain candle into something special. Start with 6–10% fragrance load by weight.
    • Thermometer — you need to monitor your wax temperature for proper pouring and fragrance binding. A simple dial thermometer works perfectly. Check our tools section for options.
    • Double boiler or wax melter — a heatproof jug inside a saucepan of simmering water works fine. If you’re going to make candles regularly, an electric wax melter is a worthwhile upgrade.
    • Wick holders or chopsticks — to keep the wick centred while the wax sets.
    • Kitchen scale — wax and fragrance are measured by weight, not volume.

    If this list feels like a lot, don’t worry — a candle making kit bundles everything together and is a great way to try candle making without buying each item separately. We’ve reviewed the best candle making kits in the UK to help you choose.

    Choosing Your Wax

    The wax you choose affects everything — how your candle burns, how it holds fragrance, and how it looks. Here are the main options available in the UK:

    Soy wax is the most popular choice for beginners and for good reason. It melts at a low temperature (around 45–50°C), it’s forgiving if you make mistakes, and it produces a clean burn with minimal soot. Brands like Golden Wax 464 and TRINIDa SoyPRO are widely available on Amazon UK. For a deeper comparison, read our guide on making soy candles.

    Coconut-rapeseed blends like Kerax are increasingly popular with UK candle makers. They offer a beautiful creamy finish and excellent scent throw, though they’re slightly more expensive than pure soy.

    Beeswax has a gorgeous natural honey colour and subtle sweet scent. It burns longer than soy but is harder to add fragrance to. It’s best for pillar candles and unscented votives. Learn more in our beeswax candle guide.

    Paraffin wax is the traditional candle wax. It’s cheap and holds colour and fragrance brilliantly, but it’s petroleum-based and produces more soot. Many hobbyist candle makers prefer soy or coconut blends for a more natural product. We compare the two in our soy vs paraffin guide.

    For your first candles, we recommend soy wax flakes. They’re affordable, widely available in the UK, and very beginner-friendly.

    Step-by-Step: Making Your First Soy Candle

    Right, let’s make a candle. This method works for a standard container candle — a glass jar or tin.

    Step 1: Prepare Your Container

    Clean your jar or tin and make sure it’s dry. Use a wick sticker or a small dab of melted wax to fix the wick sustainer to the centre of the bottom. Press it down firmly. Place a wick holder bar or two chopsticks across the top of the jar to keep the wick straight and centred.

    Step 2: Measure and Melt the Wax

    Weigh your wax flakes. As a rough guide, you’ll need about 80% of your container’s volume in wax (wax shrinks slightly as it cools). For a standard 200ml jar, start with around 160g of soy wax.

    Melt the wax using a double boiler: place a heatproof jug or pouring pitcher inside a saucepan of gently simmering water. Add the wax flakes and stir occasionally. Use your thermometer to monitor the temperature — you want to reach around 80–85°C for fully melted soy wax.

    Never melt wax directly over a flame or in the microwave. Always use a double boiler or a dedicated electric wax melter.

    Step 3: Add Fragrance Oil

    Once the wax is fully melted, remove it from the heat and let it cool to around 60–65°C. This is the ideal temperature for adding fragrance oil to soy wax — hot enough to bind properly, but not so hot that the fragrance evaporates.

    Add your fragrance oil at 6–10% of the wax weight. For 160g of wax, that’s roughly 10–16ml of fragrance oil. Stir gently and continuously for about two minutes to make sure the fragrance is evenly distributed throughout the wax.

    Want to learn more about getting the perfect scent? Read our guide on making scented candles and our explanation of fragrance load.

    Step 4: Add Dye (Optional)

    If you want coloured candles, now is the time to add your dye. Candle dye blocks or liquid dyes work best — shave off a small amount of a dye block, or add a few drops of liquid dye, and stir well. Start with less than you think you need — the colour will deepen as the wax cools.

    Step 5: Pour the Wax

    Let the wax cool to the recommended pouring temperature for your wax type. For most soy waxes, this is around 55–60°C. Pouring too hot causes problems like sinkholes and poor adhesion.

    Pour the wax slowly and steadily into your prepared container. Leave about 1cm of space at the top. Keep the wick centred using your wick holder.

    Top tip: reserve about 10–15% of your melted wax for a second pour. Soy wax often develops small sinkholes as it cools. Once the first pour has fully set (usually 4–6 hours), poke a few relief holes around the wick with a cocktail stick and pour a thin top-up layer to create a smooth, flat surface.

    Step 6: Cure and Trim

    Let your candle cure for at least 48 hours before burning — ideally a full week for soy candles. Curing allows the fragrance to fully bind with the wax and gives you a much stronger scent throw.

    Before lighting, trim the wick to about 5–6mm. This prevents mushrooming (a carbon ball forming on the wick tip) and gives you a cleaner, more even burn. If you encounter wick issues, our guide on choosing the right wick can help.

    Common Beginner Mistakes (And How to Avoid Them)

    Every candle maker makes these mistakes at first. Here’s how to avoid the most common ones:

    Pouring too hot: If you pour the wax above the recommended temperature, you’ll get sinkholes, wet spots (gaps between the wax and the glass), and poor scent throw. Always check the temperature with a thermometer — don’t guess.

    Wrong wick size: A wick that’s too small won’t melt the wax all the way to the edges, causing tunnelling. A wick that’s too big will burn too fast, produce excess soot, and could overheat the container. Our wick guide explains how to match wick size to container diameter.

    Too much fragrance: More isn’t always better. If you exceed the wax’s fragrance capacity, the oil can seep out, the candle can burn unevenly, and you might get poor scent throw. Stick to the manufacturer’s recommended fragrance load — usually 6–10% for soy wax.

    Not curing long enough: We know it’s tempting to light your candle straight away, but give it time. An uncured candle will have a weak scent throw. A week of curing makes a real difference.

    Rushing the first burn: The first time you light a new candle, let it burn until the melt pool reaches the edges of the container. This usually takes 1–2 hours. If you extinguish it too early, the candle will “remember” that burn pattern and tunnel on subsequent burns.

    What to Make Next

    Once you’ve mastered a basic container candle, there’s a whole world of candle making to explore:

    And when you’re ready to take it further, our guide on starting a candle business in the UK covers everything from CLP labelling regulations to pricing and selling your candles.

    Recommended Equipment

    We’ve tested and reviewed the most popular candle making supplies available in the UK. Here are our top recommendations to get you started:

    Happy candle making! If you have questions, drop us a message via our contact page — we love hearing from fellow candle makers.

    Related Reading